How to Choose Tattoo Placement: Compare Two Spots First
Choose a tattoo placement by comparing design shape, size, visibility, movement, and future plans, then test two options before your artist consultation.

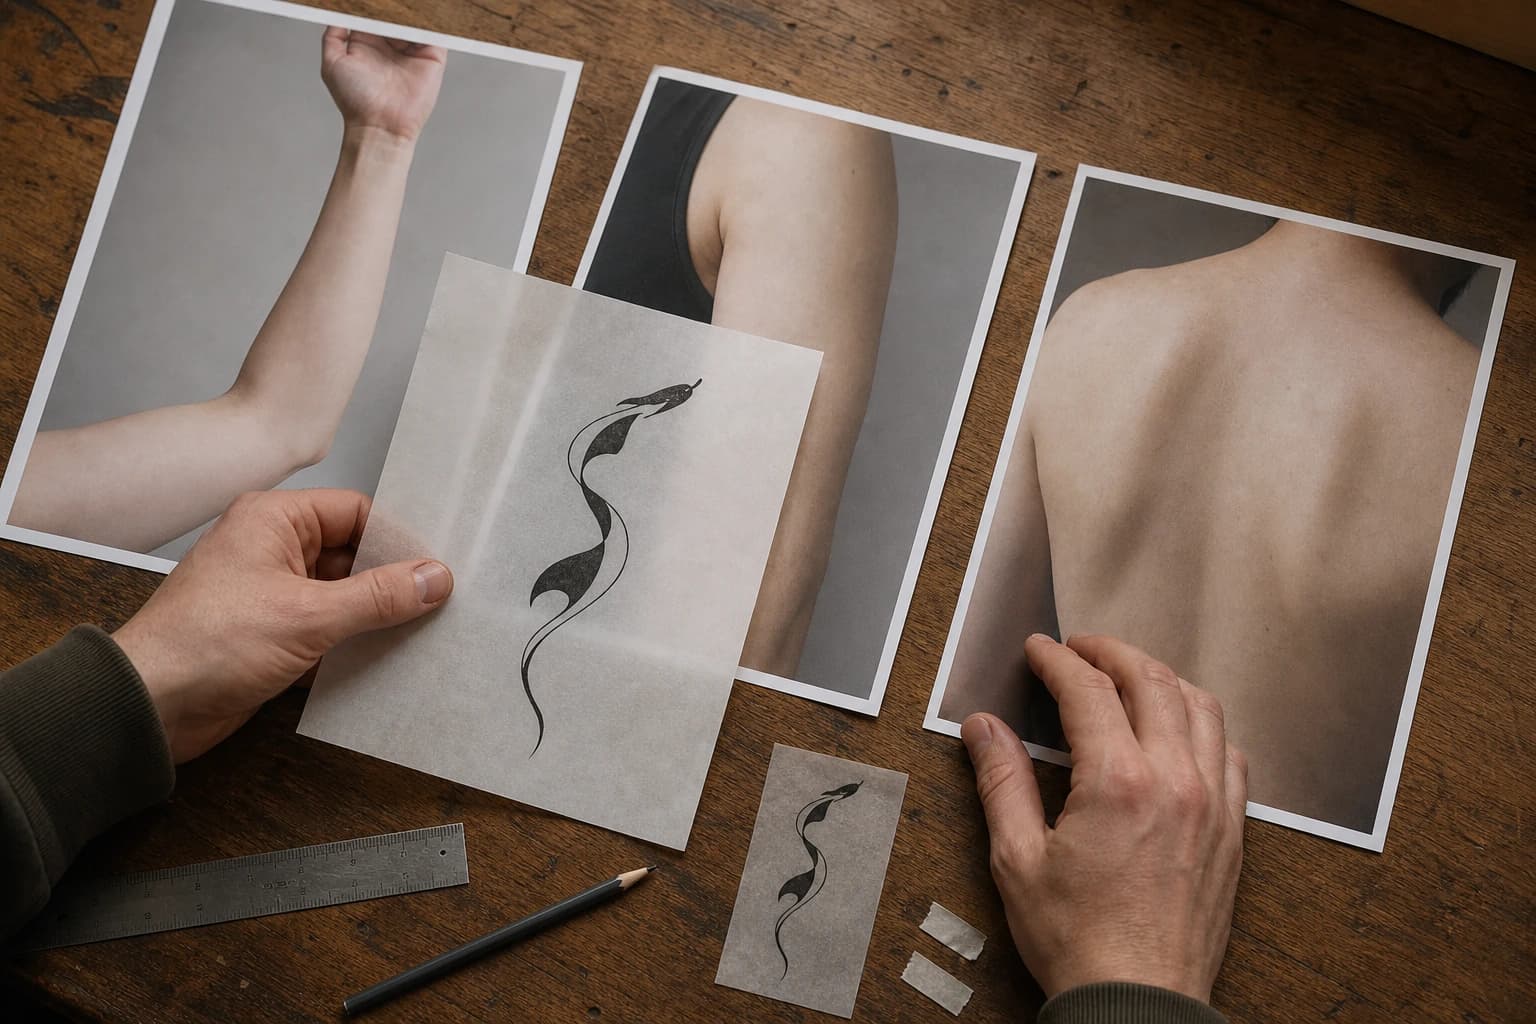
AI-generated examples, body references included
To choose a tattoo placement, shortlist two areas that suit your design’s shape and rough size. Test a measured paper template in both, then compare visibility, movement, room for future tattoos, and your daily routine. Bring a preferred option and any unresolved questions to your artist for the final size and stencil check.
Start with any firm requirements, such as keeping the tattoo covered at work. Then consider which areas give your design room to work. If pain is a deciding concern, discuss the specific placement and session with your artist before committing.
Start with the design, not a body-part list
Start with one design direction. If you are still choosing between unrelated tattoos, placement comparisons will create more options without resolving the idea. Our guide to narrowing down tattoo ideas uses a must-keep, flexible, and avoid card for that earlier decision.
Once the direction is clear, describe its overall silhouette. You are not choosing an exact size yet; you are identifying which body areas give the composition room to work.
| Design shape | Placements worth testing | What to check |
|---|---|---|
| Tall or trailing | Forearm, calf, shin, upper arm, spine area | Does the main line follow the limb instead of fighting it? |
| Wide or horizontal | Upper back, chest, thigh, shoulder blade | Is there enough width without shrinking important detail? |
| Compact or centered | Shoulder, upper arm, thigh, calf | Does it still feel intentional when viewed from a few steps away? |
| Wrapping or continuous | Arm, leg, shoulder, torso | Where is the main view, and what disappears around the curve? |
Use the table to find candidates. An artist may suggest another area or adapt the composition; ask which details would need to change.
Professional tattoo artist Vladimir Vishar likewise recommends considering size, movement, visibility, body shape, and lifestyle together, then letting the artist adapt the design to the person’s anatomy (TattooGuide).
Use five filters to compare placements
1. Design fit and readable size
Every tattoo needs enough room for its lines, gaps, and contrast to remain legible. That minimum depends on the drawing, technique, and artist, not on a universal size chart.
For each candidate area, ask whether the main shape fits comfortably and which details become crowded when reduced. Bring a rough size range to the consultation so the artist can advise on spacing and simplification.
2. Visibility in your ordinary week
“Visible” is not a single yes-or-no choice. Consider three audiences: you, other people, and a camera or mirror.
An inner forearm piece may be easy for you to look at while still changing dramatically when you rotate your arm. An outer upper-arm piece may read more clearly to other people and may be easier to cover with some clothing. A back placement can create a broad canvas while rarely entering your own direct view.
Test the clothes you actually wear for work, exercise, formal events, and hot weather. Do not plan around an imaginary wardrobe or a future version of your routine.
3. The body’s neutral position and movement
Judge placement first while standing naturally, not while twisting to create the most flattering photo. Then check what happens when you bend, reach, sit, and walk.
Look for three things:
- Primary view: the angle from which you most want the design to read
- Body flow: whether the longest line follows or deliberately crosses the anatomy
- Distortion: which important details move across a joint or disappear around a curve
Movement is not automatically a flaw. A wrapping snake, vine, or abstract form may benefit from it. You simply want the movement to be a choice rather than a surprise.
4. Space for future tattoos
One small tattoo can quietly reserve a large area. A centered forearm design, for example, may leave narrow gaps that are harder to connect later than a piece placed with an eventual sleeve in mind.
If you might add more work, ask:
- Is this intended to stand alone, join a patchwork collection, or begin a larger composition?
- Does the placement leave useful negative space rather than accidental slivers?
- Would you regret using a broad, relatively flat canvas for this particular idea?
If you are unsure about future work, ask how each option would affect adding to the area later.
5. Care and exposure you can realistically manage
Think about sun exposure, repeated rubbing from clothing or equipment, and whether the area is practical for your routine. The American Academy of Dermatology notes that ultraviolet light can fade some tattoo inks and recommends protecting healed tattooed skin from the sun with broad-spectrum, water-resistant SPF 30 or higher (American Academy of Dermatology).
Ask your artist how clothing, equipment, and your schedule might affect care for each candidate area.
Shortlist two placements and name the deciding constraint
Choose two promising areas. For each of the five filters, record a short observation and mark it works, does not work, or ask the artist. A specific note is more useful than a total score: “covered by my work sleeve” explains a preference; “4 out of 5” does not.
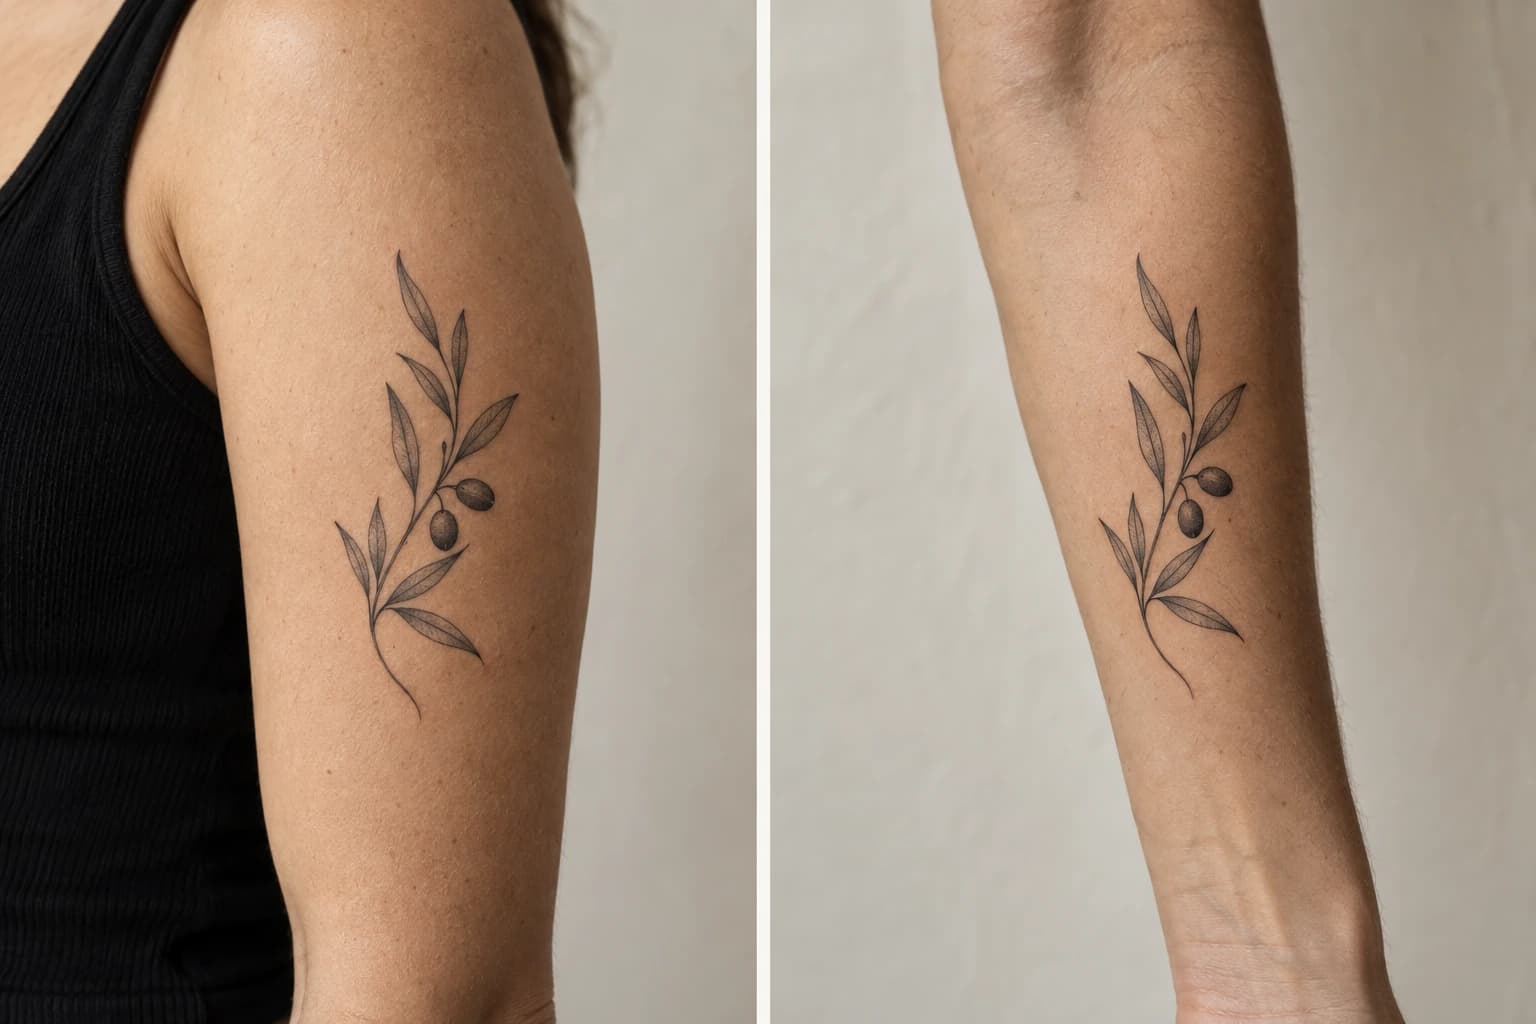
AI-generated examples, body references included
Left: upper arm. Right: forearm. Editorial placement simulations, not BeforeOuch product results.
The similar olive-branch motifs make the location change easy to see. For your own comparison, use one measured template: apparent size in separate images does not establish the dimensions on your body.
In this hypothetical paper-template comparison, the idea is a tall botanical design, and the reader wants it covered by their usual short-sleeved work shirt:
- Design fit: both areas remain candidates; the artist needs to confirm size and spacing for the actual drawing.
- Visibility: in this example, the forearm template stays exposed, while the upper-arm template stays under the sleeve during ordinary movement. The forearm fails the coverage requirement.
- Movement: the template fits clear of the elbow crease in both positions. The artist still needs to check how the design follows the skin when the arm bends.
- Future space: the reader is considering a forearm sleeve later, so preserving that area supports the upper-arm option.
- Care and exposure: a work bag strap crosses the proposed upper-arm position. The reader needs to resolve that practical conflict and ask about aftercare before booking.
The upper arm is the provisional preference because it meets the coverage requirement and leaves the forearm free. Size and the bag-strap conflict remain questions for the consultation. If those cannot be resolved, test a nearby position or reopen the shortlist.
How to test tattoo placement at home
Use a ruler, a paper copy of the design or its outline, and the clothes you want to test. A helper makes it easier to check areas you cannot reach.
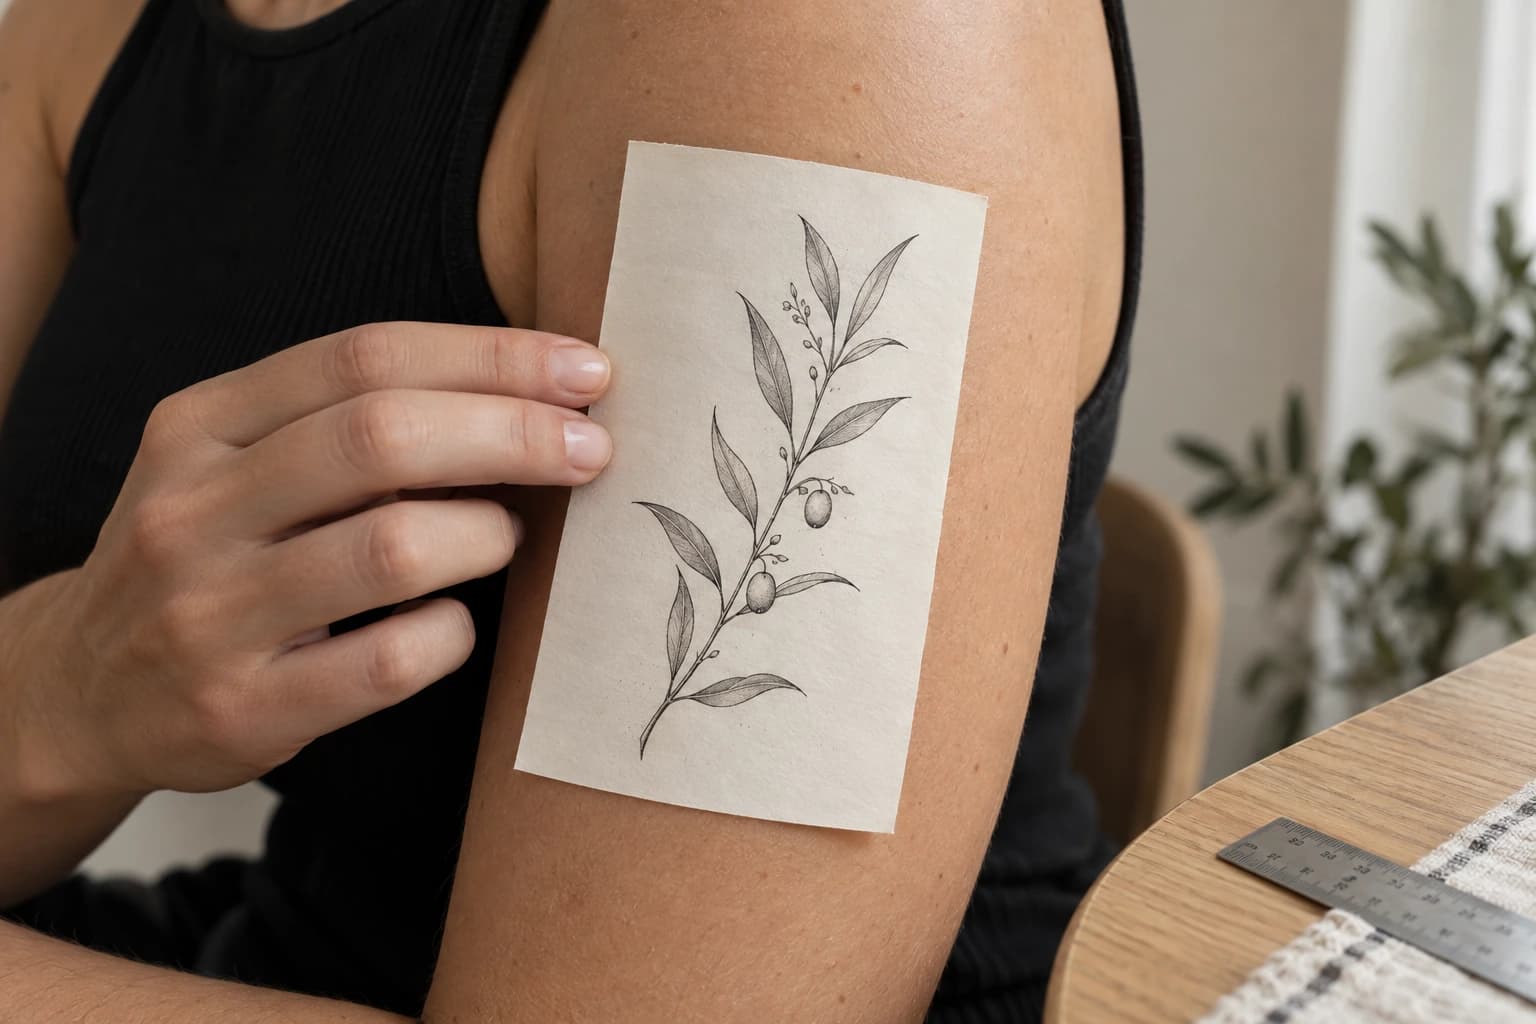
AI-generated examples, body references included
Hold the paper against the candidate area, then check where its edges fall relative to sleeves, straps, and joints.
- Make a measured template. Print the design or sketch its outline on paper. Measure the printed artwork with a ruler, since printer scaling can change it. Write its height and width beside it. You can compare the outline even if the drawing is unfinished.
- Hold the same template at both locations. Stand naturally and ask someone to help with areas you cannot reach. Keep the drawing on the paper. Check the full silhouette in a mirror, then put on the clothes that matter to your decision.
- Check coverage and movement separately. Hold the template in place while gently bending or reaching. Note sleeve edges, straps, and details that disappear around a curve. Paper cannot reproduce how a tattoo moves with skin; the artist’s stencil check still matters.
- Adjust size if needed. Start with the same measured template to make the location comparison useful, then try a larger or smaller one if the fit needs work. Record each version’s dimensions. If you take photos, keep camera distance, posture, and light consistent; save one close view and one wider view of each option.
- Return to the notes the next day. For each of the five filters, record what worked, what failed, and what still needs the artist’s judgment. Choose a provisional preference with one clear reason, or identify the unresolved question that prevents a choice.
For an optional digital reference, BeforeOuch 3D Tattoo Try-On lets you place artwork on the visible area of a body photo. It does not choose the best body location for you or establish physical dimensions. If another candidate area is outside the frame, photograph that area separately.
Decide orientation in the body’s natural position
Orientation becomes especially noticeable with faces, animals, lettering, flowers with a clear top, and any design that reads differently upside down.
Set Sail Tattoo Studio recommends orienting a forearm design so it appears upright to another viewer when the arm hangs naturally, typically with the top toward the elbow and the bottom toward the wrist. The studio notes that wearer-facing forearm tattoos can look upside down to others in that resting position (Set Sail Tattoo Studio).
If you prefer it upright from your own viewpoint, say so. Ask the artist to show both orientations with the stencil while you stand naturally, and discuss how either would fit future work.
What to bring to your tattoo artist
Bring one clear concept reference, your two measured placement views, and the brief below. Use them to ask four questions:
- What is the smallest size at which this design will remain readable in your style?
- How would you change the composition for each placement?
- What happens to the main view when this body area moves?
- Does either option create a problem for future work in the area?
The artist may recommend a different size, angle, or nearby position after seeing your anatomy. Keep the important design elements clear while leaving room for that adjustment.
Save this brief with your comparison photos:
PLACEMENT BRIEF
Design reference:
Option A / rough height × width:
Option B / rough height × width:
Must meet:
Preferred option and why:
Care / clothing / future plans:
Question for the artist: